RTS Blog
Subscribe via RSS.
I am creating a real-time strategy (RTS) game in WebGL and ClojureScript. This is my blog about the process. I made the mistake of not documenting my development initially, but I will start now (25.04.2017) and try to look back on the code I've already written. If you want to comment on this blog open an issue per topic or find an existing one on the GitHub repository. I might attach issue comments to the blog later using this process.
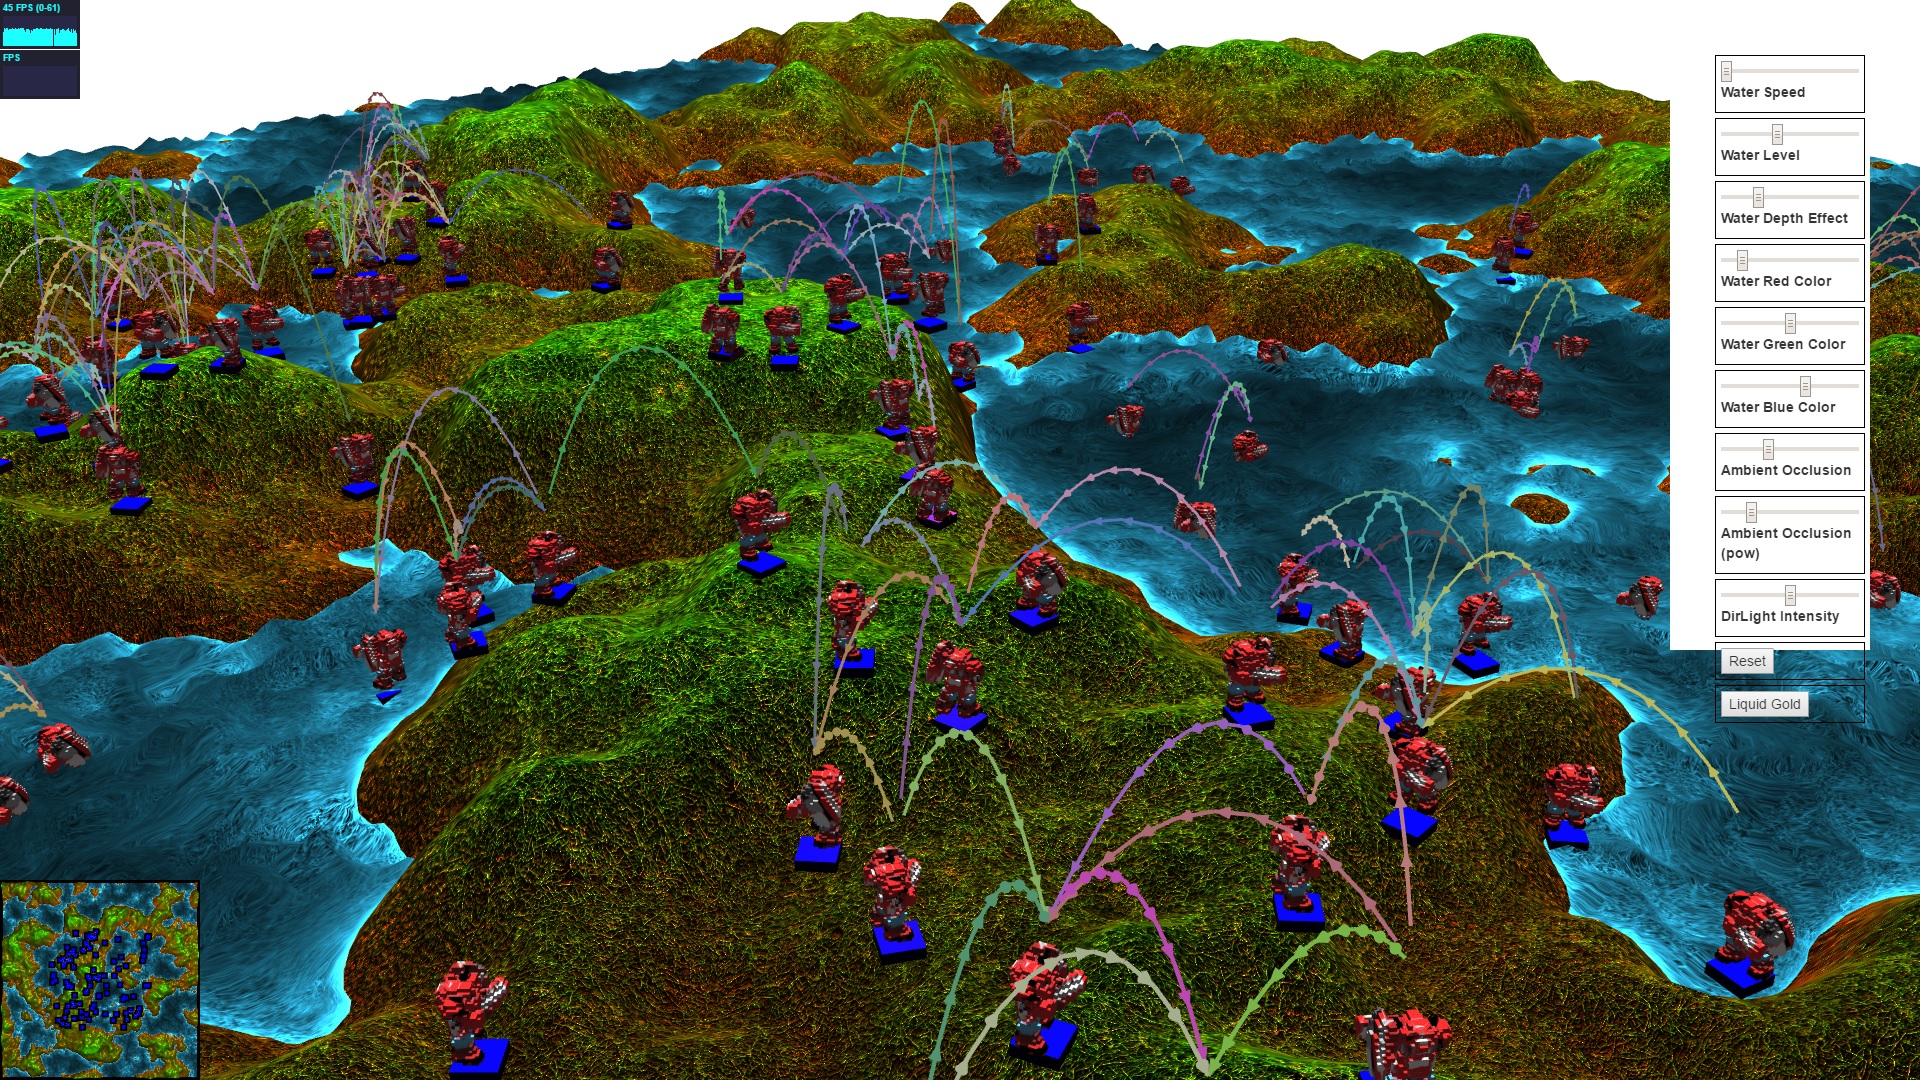
The following screenshot will be updated as the game progresses (historical images will be in the blog posts about each feature):
Posts (oldest first)
History
Initially the game was written in JavaScript with Babel, the ES2015 and beyond to ES5 compiler. I switched (more or less complete rewrite) to ClojureScript because the mutable state everywhere was becoming a mess, for hot code reloading and because Babel compilation times were too high (I think on the order of 30 seconds, but I don’t remember so well). I still haven’t implemented feature parity with the original version, but I’ve been focusing on new features like fancy terrain and water instead and notably Starcraft 2 3D model support has been dropped. I suppose the Starcraft 2 on WebGL headline was sparking some of the initial interest, getting a Hacker News submission on the front page and around 13k views, but support for non-free models is by far not the primary goal of the project. Developing a strong and independent engine is.
Here is a screenshot of the version with free models:
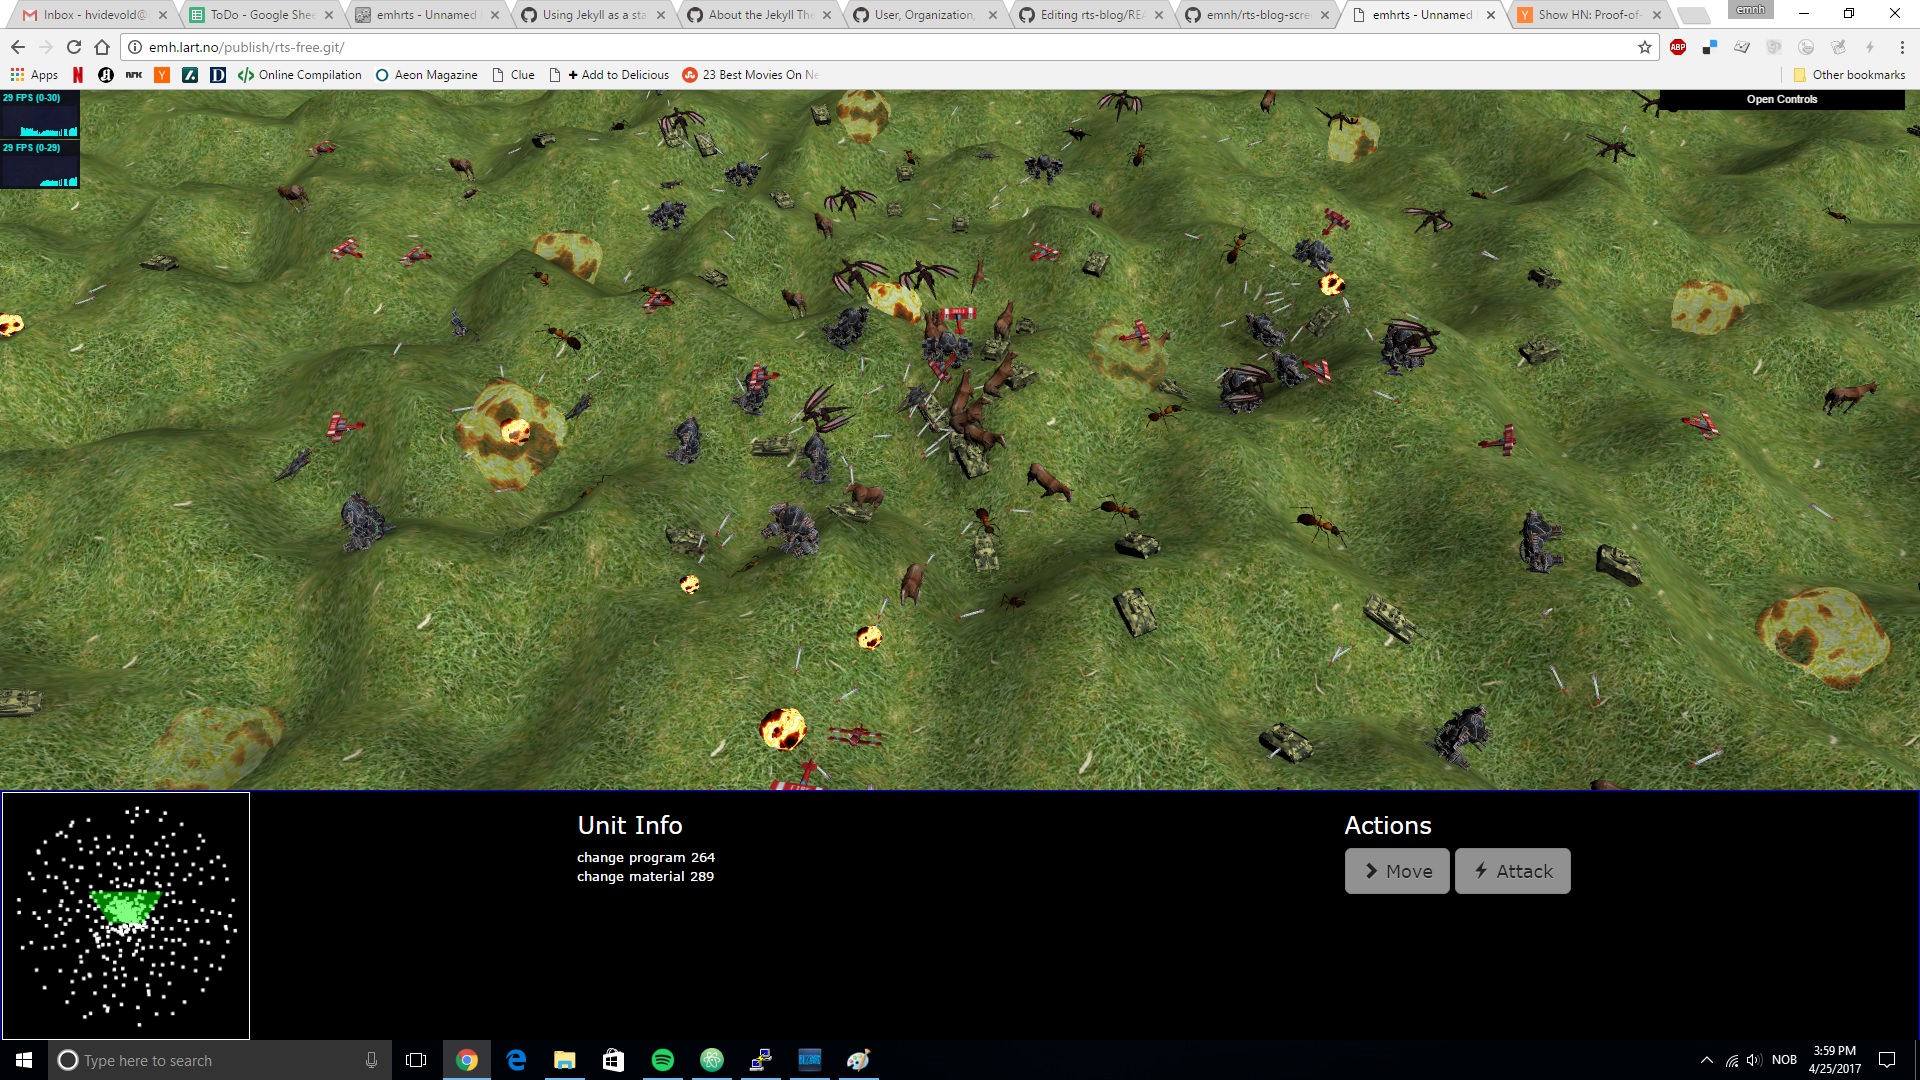
The version which downloaded SC2 models from another host is not working anymore since the host is not serving the files anymore, so all you can do is watch YouTube videos of it (or if you are brave check out the legacy branch of rts and try to get it to work):
Game plan
My RTS will at least contain the major engine components that an RTS needs. We’ll see what it ends up as. It might become just an engine with a simple tower defense as a demo or something totally different, depending on technical hurdles and wild ideas coming up during development experiments. I am not sure whether I will support multiplayer yet, or whether I will make a series of single player tutorial steps where you write JavaScript or ClojureScript to control the AI of the game to overcome various scenarios (test cases), like CodingGame, but with fancier graphics and more complex rules similar to a commercial RTS. Currently I am leaning towards the latter, because it allows more freedom about simulation speed and no synchronization issues, but at the same time I want the game to be deterministic with a replay function, so I can’t generate too much simulation data. It will be hard to tack on multiplayer support later, so I need to make the decision before I start implementing the engine logic beyond the graphics. Currently I’ve been focusing on the graphics. I defer naming my game until I know what it will be about. I detest having to repeat myself in strategy games building the base, so I want it to be able to be automated as well as avoid any stressful micro with AI scripts, but I still want the game to be able to have human interaction with scripts as executable in-game tasks. The game should be designed such that the best human strategy should win over any AI macro/micro helper scripts.
See also Design.md for more random thoughts.
ClojureScript component architecture
I chose Stuart Sierra’s component framework for ClojureScript to implement the game components. This accomplishes basically the same as a dependency injection framework: all the dependencies, the wiring together of components, are specified at the top level and allows for more easy reconfiguration. A component is a record with a protocol (interface) for start and stop methods. Whenever you change a file, figwheel reloads the scripts for the page and using the component library I restart by calling stop on each component in the system, in reverse dependency order, and then start on each one in forward order. In practice, for most heavy components, like the resource loader for textures and geometries, I do nothing in the stop handler and in the start handler I only load the resources if they haven’t been loaded before. I only do a real stop and start for light components, and for the component which I am currently working on. I should have been more diligent about implementing proper stop handlers and a system for changing which components get reloaded and not, as I currently have to do a full page reload for most changes, so I’m losing hot reloading. I just got lazy about it. I need to do some refactoring to address the issue, but page reloads are not much slower currently than a figwheel reload. Refactoring for hot reloading will pay off if I am in the middle of a game and want to change something however, but I want to be able to serialize game state anyway, so perhaps saving to localStorage and page reload will do.
I made a helper macro for creating components called defcom that defines a component record along with its dependencies, since I will know them up front. It also adds :start-count, :stop-count and :started properties to each component. Most functions still take a component as input, which is basically a dictionary (in ClojureScript record form). So functions take dictionaries and return dictionaries, which makes it easy to add arguments.
All state is kept in one global dictionary, but again, I haven’t been diligent about separating updatable atoms and JS objects from serializable state. I need to think more about this and refactor to address this as well, kind of like a virtual DOM that separates input state from UI objects for three.js, recreating and deleting UI objects as units are updated for example. I also look for inspiration from the redux project, to be able to replace local component atoms with a grand central dispatch which updates the global nested state dictionary.
At one point I investigated a lot of alternatives to Stuart’s component (list taken from danielsz system):
They all have advantages and disadvantages, but in the end I decided not to switch (yet). I’ve been looking hard at plumatic plumbing graph to wire together dependencies lately, and I might switch to that, but I haven’t felt like refactoring yet.
ClojureScript React library (Rum)
Source code of example usage is here. The settings on the right of the screenshots, like “Water Depth Effect”, are all Rum.
I chose to use a ClojureScript React library called Rum. I don’t remember why I chose this over Om or Reagent. I think it might have been this point from the Rum readme: “No enforced state model: Unlike Om, Reagent or Quiescent, Rum does not dictate where to keep your state. Instead, it works well with any storage: persistent data structures, atoms, DataScript, JavaScript objects, localStorage or any custom solution you can think of.” Anyway the point of using any such React library over plain HTML for me is that hot reloading comes for free. This does not apply to the three.js canvas though.
Single-page application
The source code is here and here.
I used the goog.History library and wrote a custom solution for loading pages. Each page is a component, and also the game page component has a subsystem which contains the game components. I have a div for each page and mount Rum on it when the component starts. The single-page app code is a bit hairy, especially some hacks to differentiate switching a page and figwheel reloads and avoiding infinite reload loops, and since only one page should be loaded at a time starting the system is different from the standard Stuart Sierra component library call to start the system. It seems to work fine now however, so I am leaving a potential cleanup for later.

Bootstrapping ClojureScript in a web worker
It is quite slow, taking about 5 seconds to load the worker, and there is no figwheel hot reload support. Here is how to bootstrap ClojureScript in a Web Worker:
console.log("from worker");
console.time("worker-load")

CLOSURE_BASE_PATH = "../goog/"
/**
 * Imports a script using the Web Worker importScript API.
 *
 * @param {string} src The script source.
 * @return {boolean} True if the script was imported, false otherwise.
 */
this.CLOSURE_IMPORT_SCRIPT = (function(global) {
  return function(src) {
    global['importScripts'](src);
    return true;
  };
})(this);

BASE_PATH = "../";
importScripts(CLOSURE_BASE_PATH + "base.js");
importScripts("../game.js");
importScripts(
    BASE_PATH + "jscache/simplex-noise.js",
    BASE_PATH + "jscache/three.js",
    BASE_PATH + "bundle-deps-worker.js");
goog.require('game.worker.core');
console.timeEnd("worker-load")
ClojureScript optimizations
In tight render/engine loops Clojure sequences over units turned out to be way too slow, so I had to replace them with plain loops. I did profiling in Chrome and checked it out. Maybe there were other optimizations but I don’t remember.
Camera control
I implemented typical RTS controls. Pan left/right/up/down, zoom in/out and also arcball rotation. Worth noting is that you should only move the camera for each requestAnimationFrame to make smoother animations, not on the keypress events themselves. The more interesting implementation was arcball rotation, which I think I got from here:
(defn arc-ball-rotation-left-right
  [state sign]
  (let
    [camera (:camera state)
     focus (scene/get-camera-focus camera 0 0)
     axis (-> camera .-position .clone)
     _ (-> axis (.sub focus))
     _ (-> axis .-y (set! 0))
     _ (-> axis .normalize)
     old (-> camera .-position .clone)
     config (:config state)
     rotate-speed (get-in config [:controls :rotate-speed])
     rotate-speed (* sign rotate-speed)
     rotate-speed (* rotate-speed (get-elapsed state))]

    (-> camera .-position (.applyAxisAngle axis rotate-speed))
    (-> camera .-position .-y (set! (-> old .-y)))
    (-> camera (.lookAt focus))))


(defn arc-ball-rotation-up-down
  [state sign]
  (let
    [camera (:camera state)
     focus (scene/get-camera-focus camera 0 0)
     axis (-> camera .-position .clone)
     _ (-> axis (.sub focus))
     offset axis
     config (:config state)
     rotate-speed (get-in config [:controls :rotate-speed])
     rotate-speed (* sign rotate-speed)
     rotate-speed (* rotate-speed (get-elapsed state))
     theta (atan2 (-> offset .-x) (-> offset .-z))
     xzlen (sqrt (+ (square (-> offset .-x)) (square (-> offset .-z))))
     min-polar-angle 0.1
     max-polar-angle (- (/ pi 2) (/ pi 16))
     phi (atan2 xzlen (-> offset .-y))
     phi (+ phi rotate-speed)
     phi (min max-polar-angle phi)
     phi (max min-polar-angle phi)
     radius (-> offset .length)
     x (* radius (sin phi) (sin theta))
     y (* radius (cos phi))
     z (* radius (sin phi) (cos theta))
     _ (-> offset (.set x y z))]

    (-> camera .-position (.copy focus))
    (-> camera .-position (.add offset))
    (-> camera (.lookAt focus))))
Terrain
The source code is here and here.
I mostly stole the code from a three.js example, since I thought it looked good.
Fast heightfield lookup
I first thought I had to do bilinear interpolation, so I implemented that, but of course, it was just triangles in the mesh, no bilinear interpolation needed. So it’s just finding the correct position in the heightfield and then interpolating the triangles, using math from here.
Voxelization of 3D geometries
First off, here is a link to the source code. Voxelization means to represent each part of a 3D geometry as a small box of the same size, rather than triangles of varying size. I used the approach described here. Well, it seems the author of that page has removed the description of the algorithm and just left the online voxelizer. Anyway, the algorithm is not too complicated: it runs entirely on the CPU (no GPU) and involves recursively subdividing each triangle in the 3D geometry until a constant threshold is hit, then check which box the triangle lies in and mark it as active / on. In addition, I did a flood fill to mark all interior boxes as on as well, since I wanted to explode the voxels and thus needed the inside filled. The algorithm is quite simple and slow, taking up to an hour to voxelize a simple 3D model, but I don’t do it realtime, I just run it offline as a script with node.js over-night and save the voxels for the game to load, so it doesn’t matter that much. If you want to do realtime voxelization you should look here instead.
Later I decided to add UV coordinates for texture mapping to each box relative to the whole 3D model so that I can texture each box as close to the original geometry as possible. I proceeded to use the same recursive subdivision of each triangle T, then for each corner V of the small triangle and for each corner C of the box which V resides in, I update the UV of the box corner C (really, the UV of the box which has this corner as top left corner) if the closest point P on the big triangle T containing V is the current closest to C, and also save T as the closest triangle to C. I update the UV to the interpolation of UVs from the corners of the subdivided triangle T from the original 3D model using barycentric coordinates and P. As an optimization, for each box corner I also maintain a set of seen triangles and skip any triangle that has been seen before, since we already know what the closest point of that triangle to the box corner is. It’s a naive algorithm in that it’s the first thing that popped into my head, even if I had a bit trouble understanding the code that I wrote before now, and I am sure there are better approaches, but at least it gave results resembling the texturing of the original triangle 3D model.
Before voxelization screenshot:
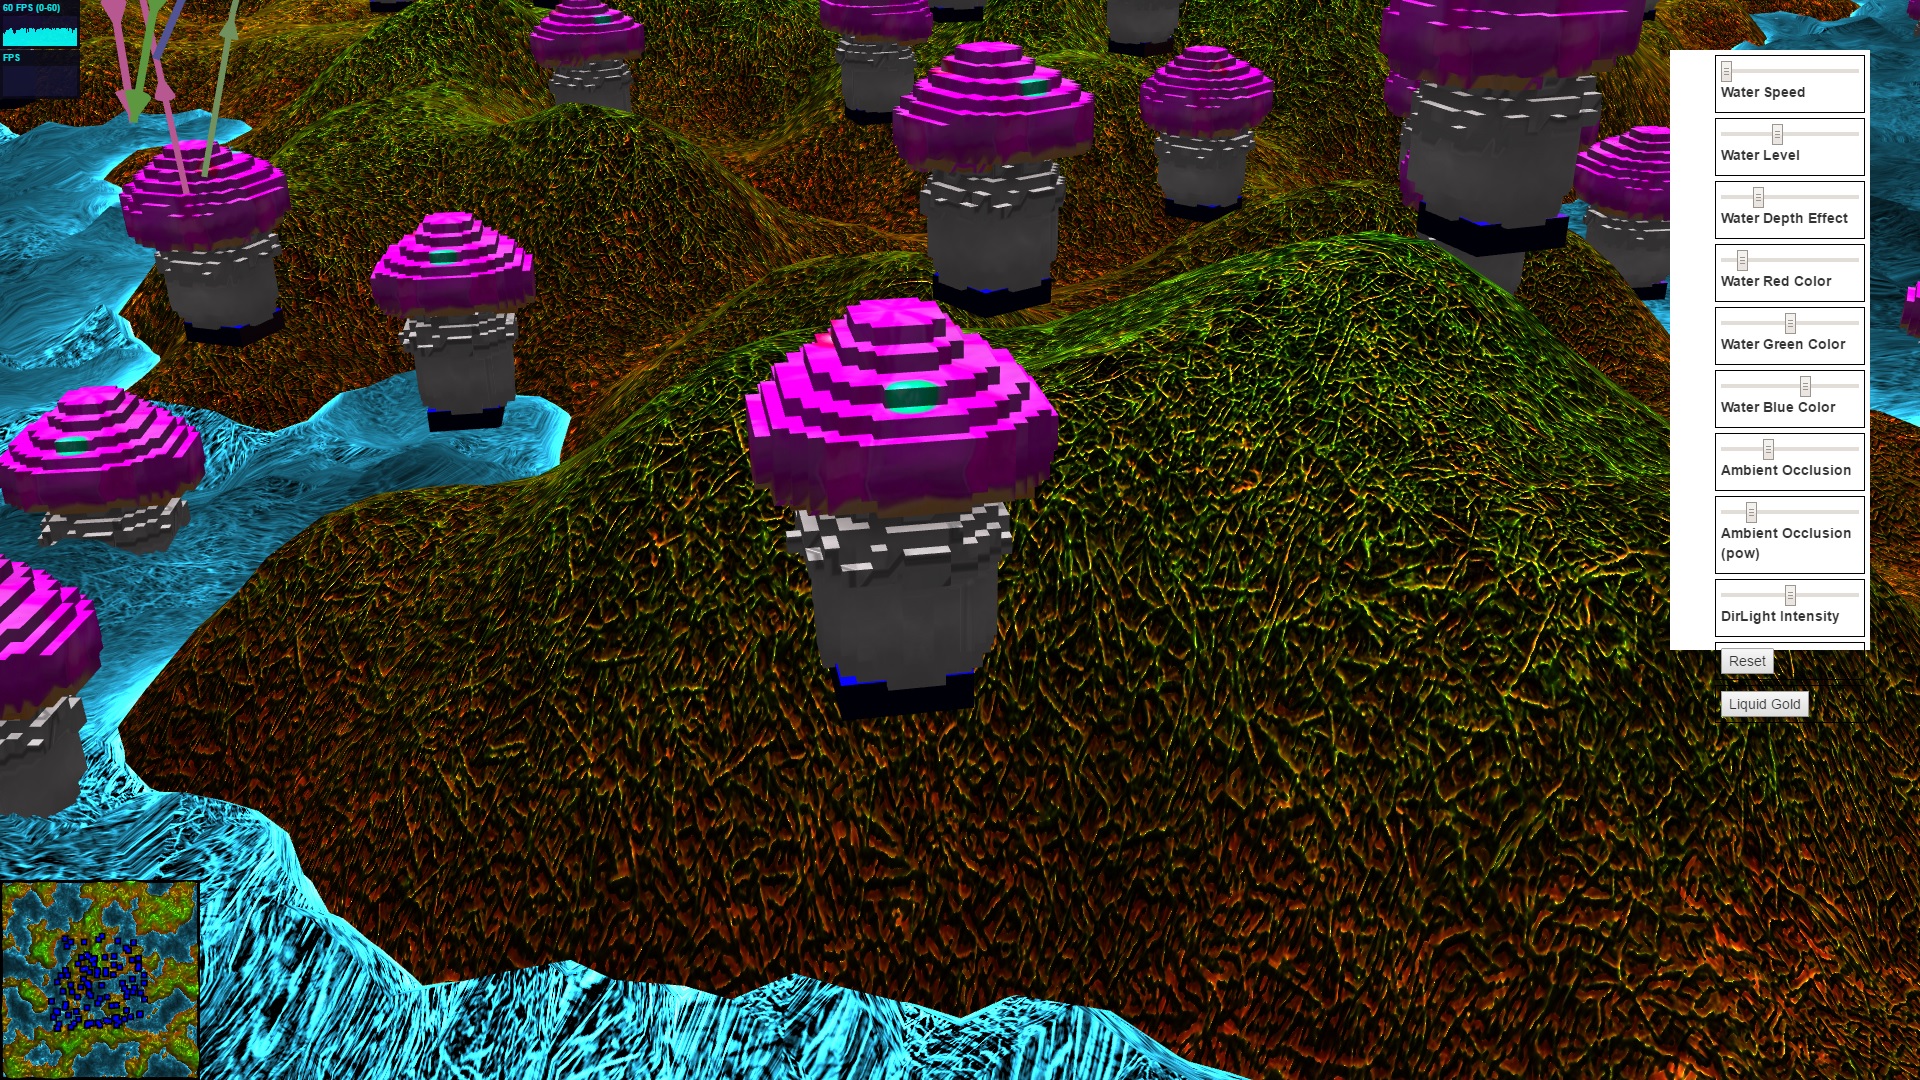
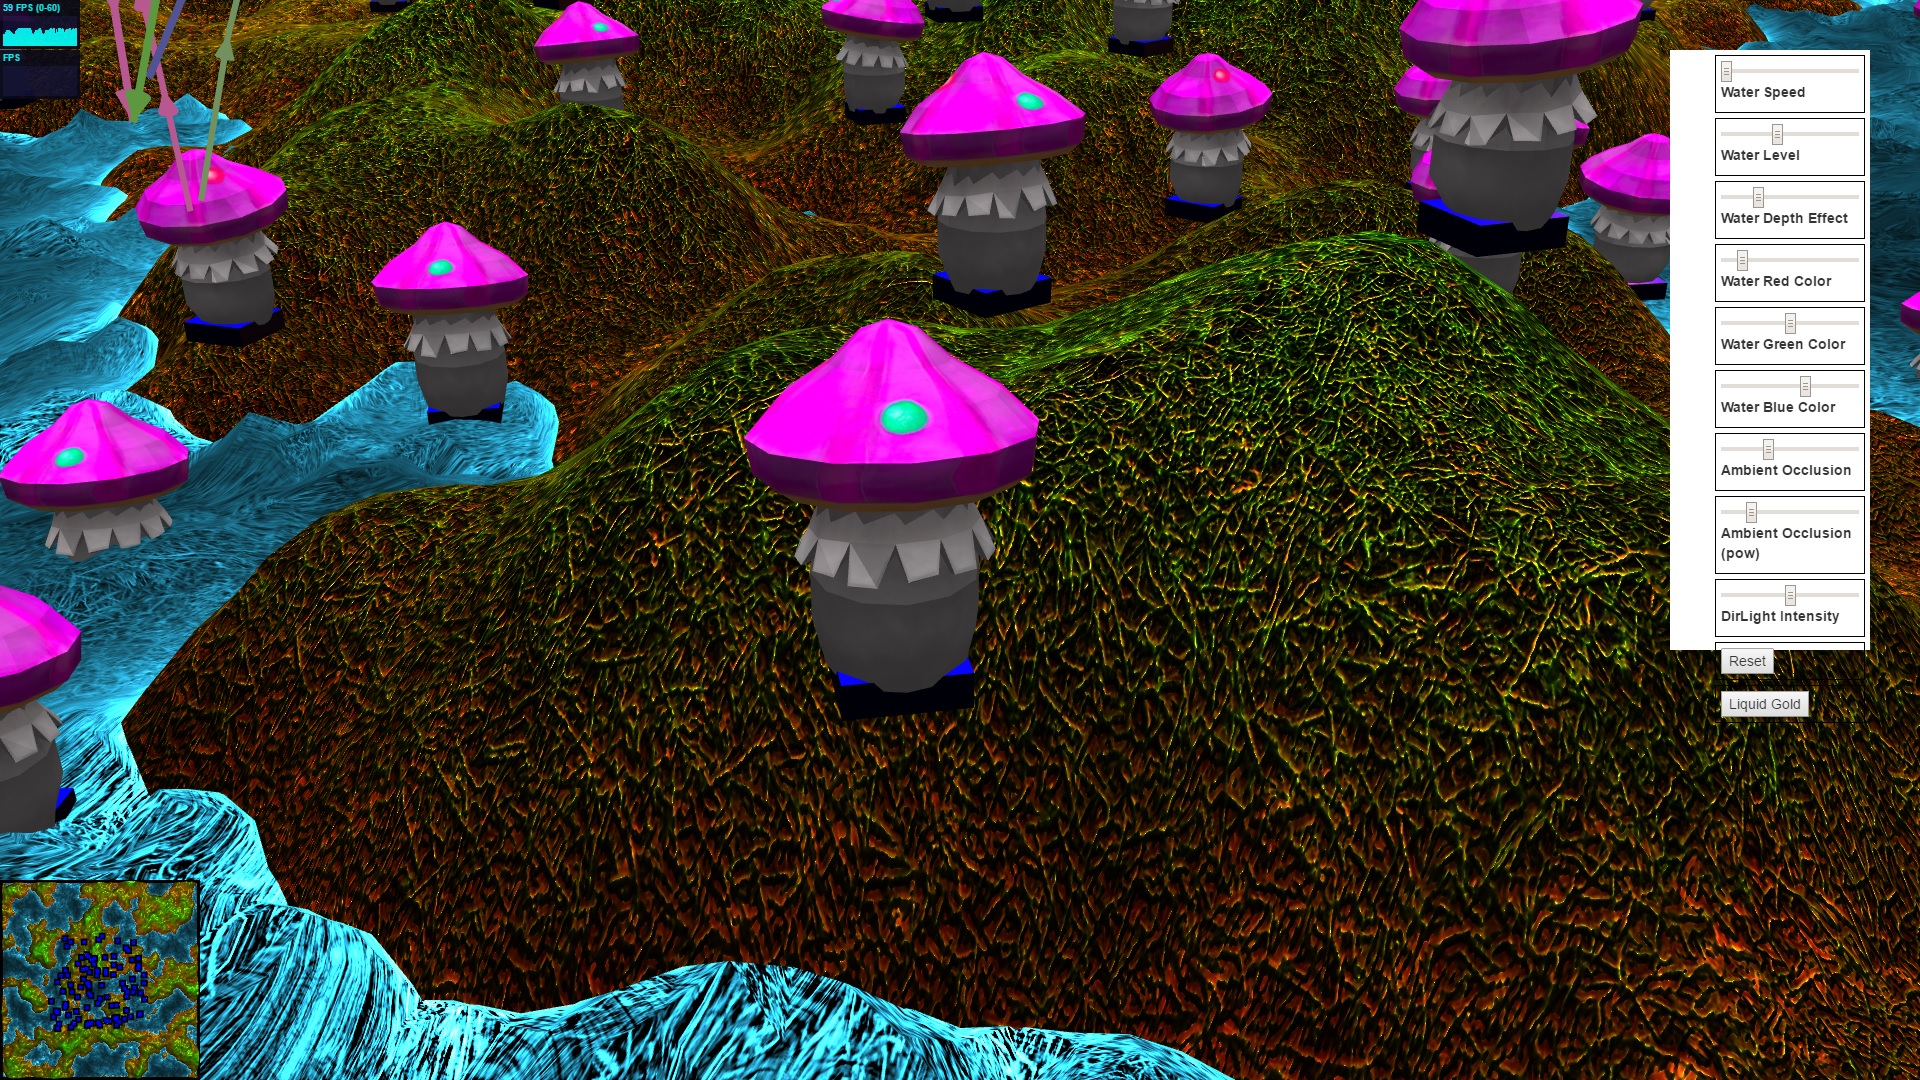 After voxelization screenshot:
TODO: Add some illustrative schematics. TODO: Describe how to edit and run the voxelization script using node.js from the commandline.
Explosions
TODO: Reread and explain how the GLSL code works. It involves a quadratic equation for intersection with the ground, making sure the voxels don’t fall through it and a height map texture lookup. Also a rotation matrix to make the exploding voxels spin. Plus normals and lighting.
Here is a screenshot:
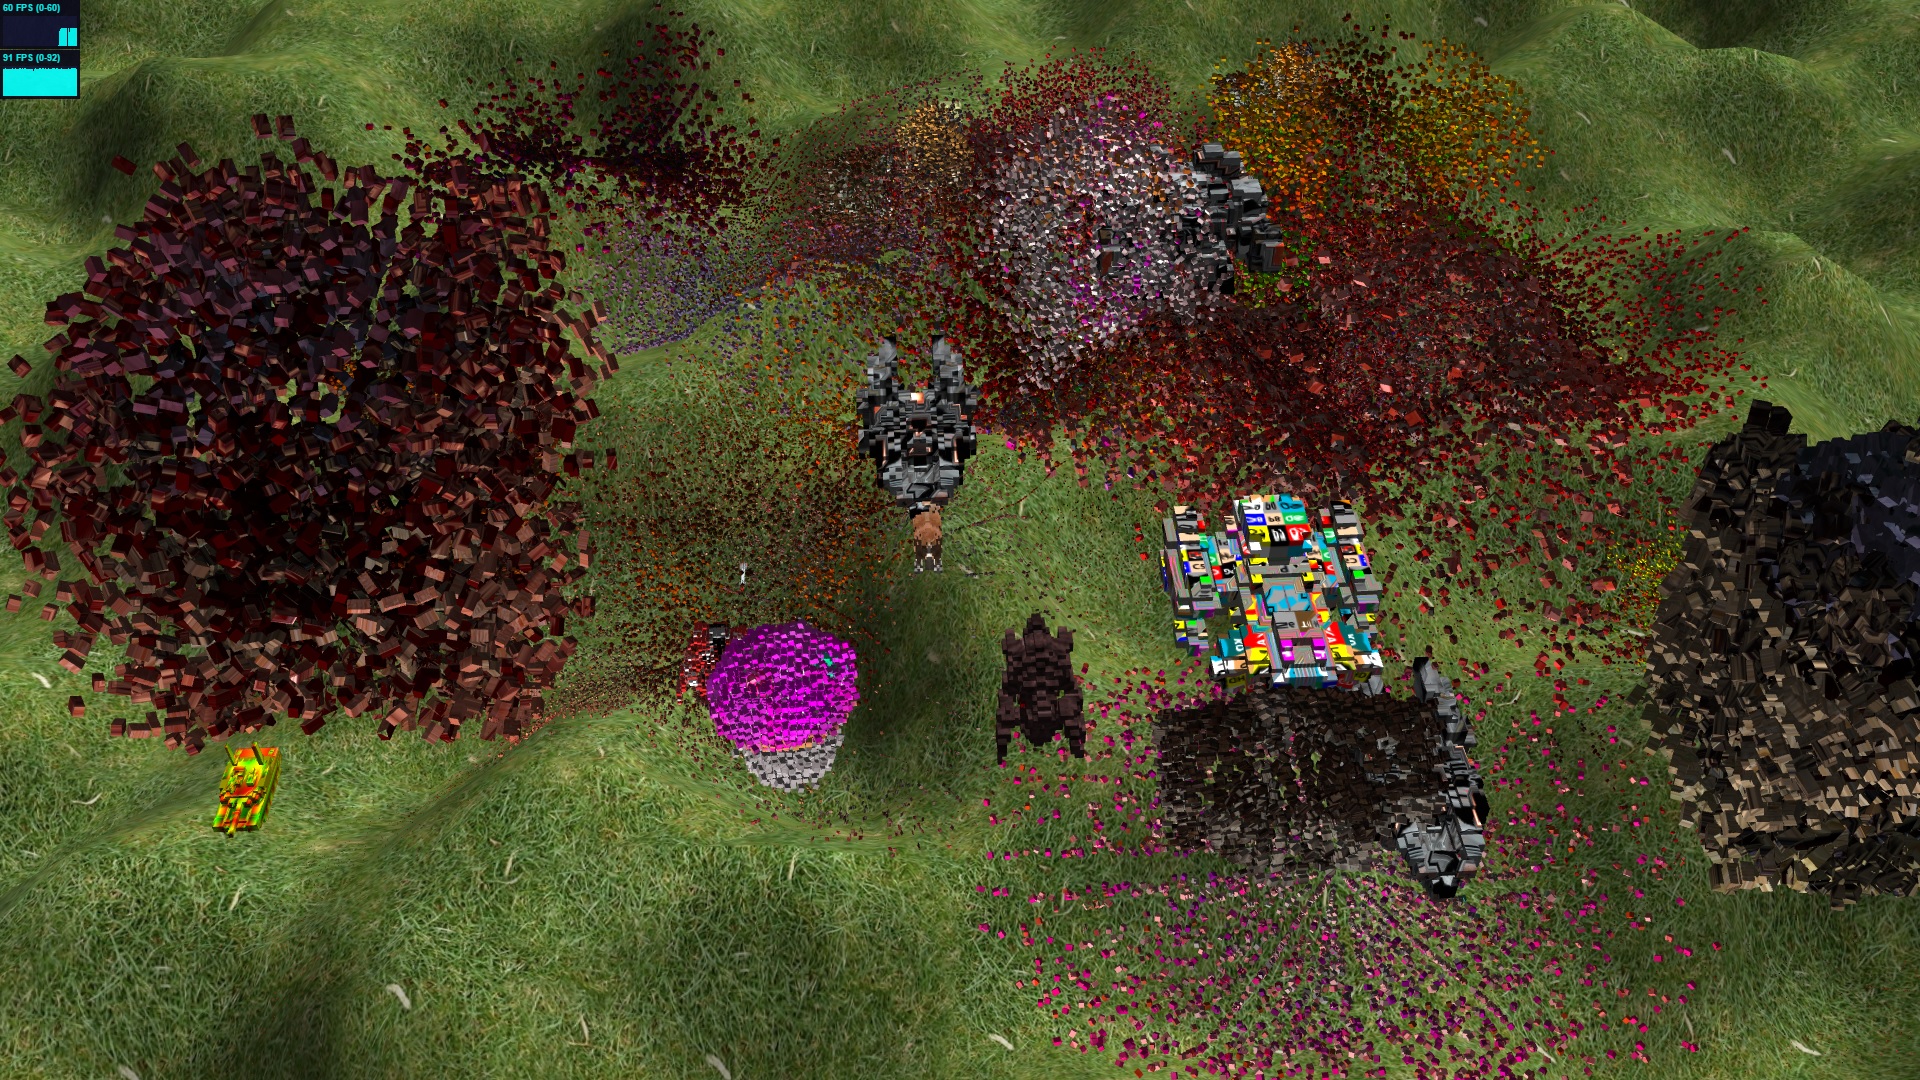
Watch the live demo here.
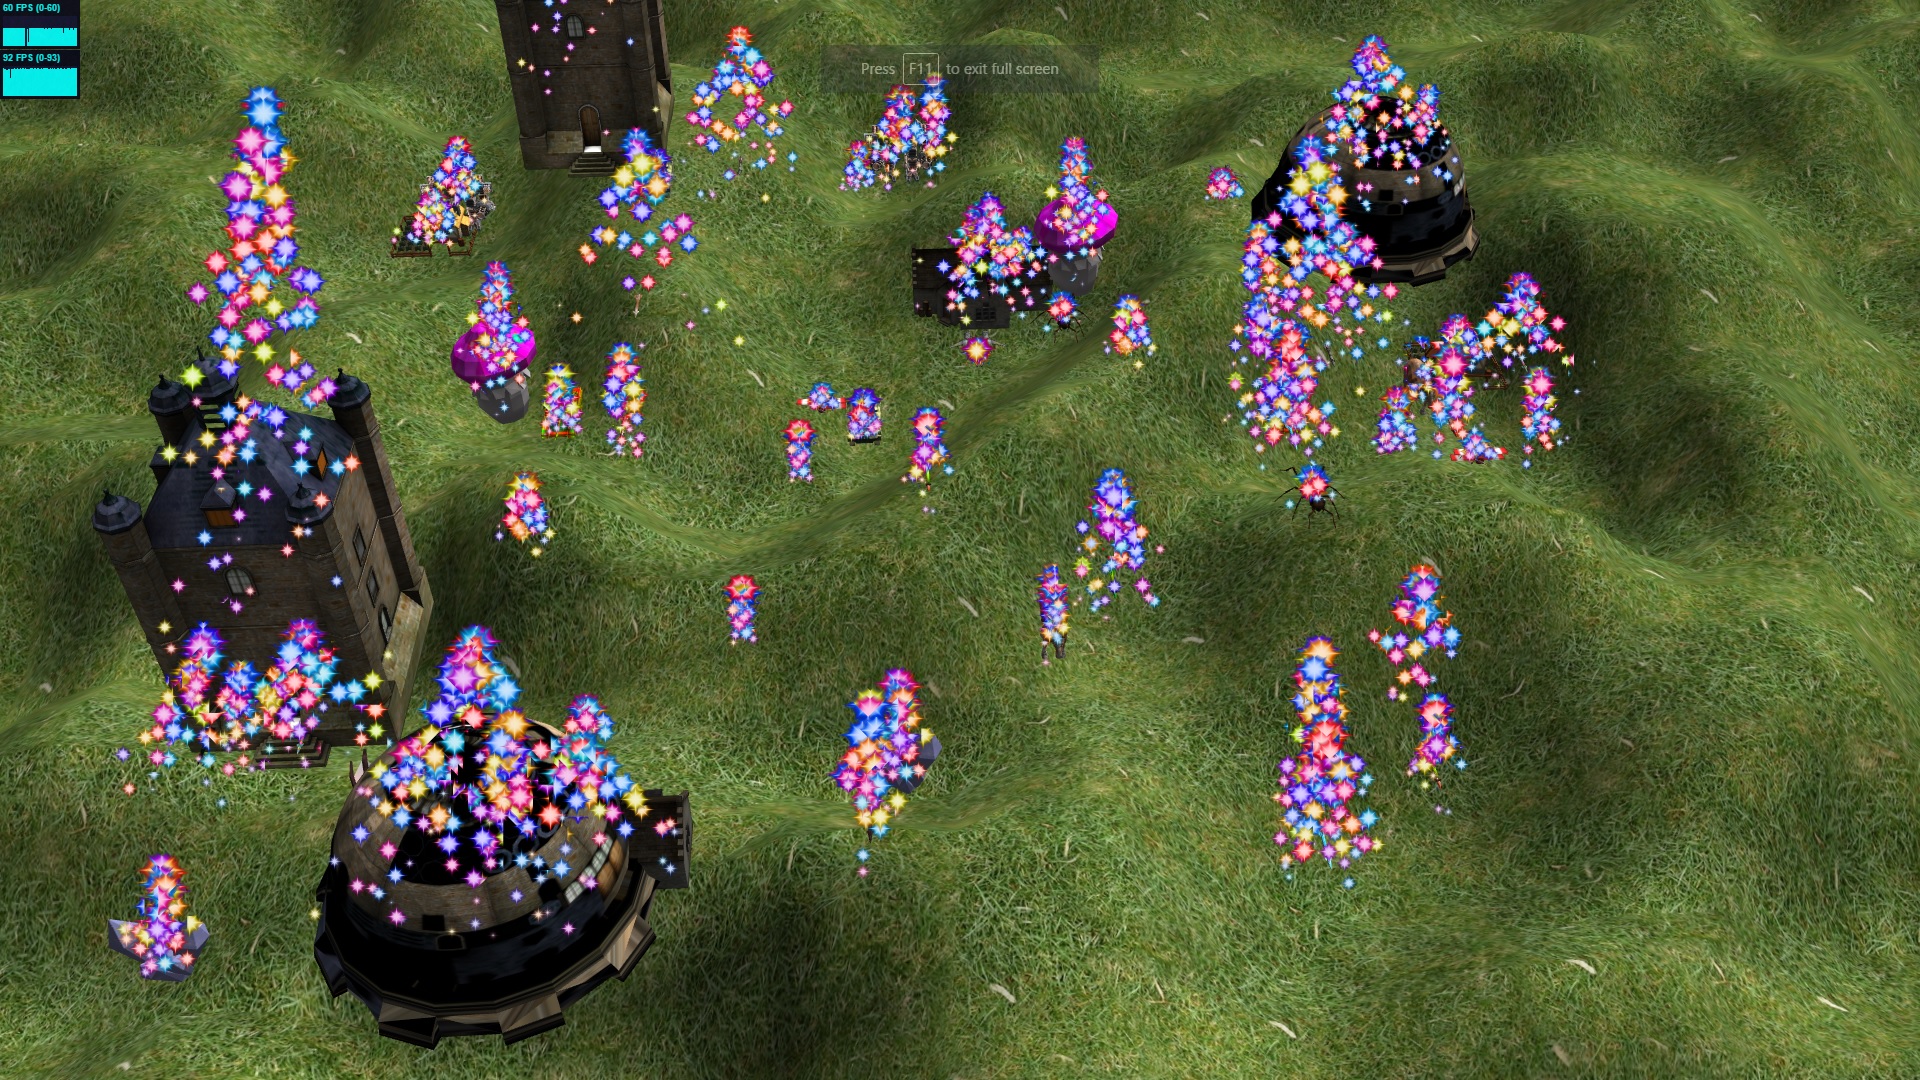
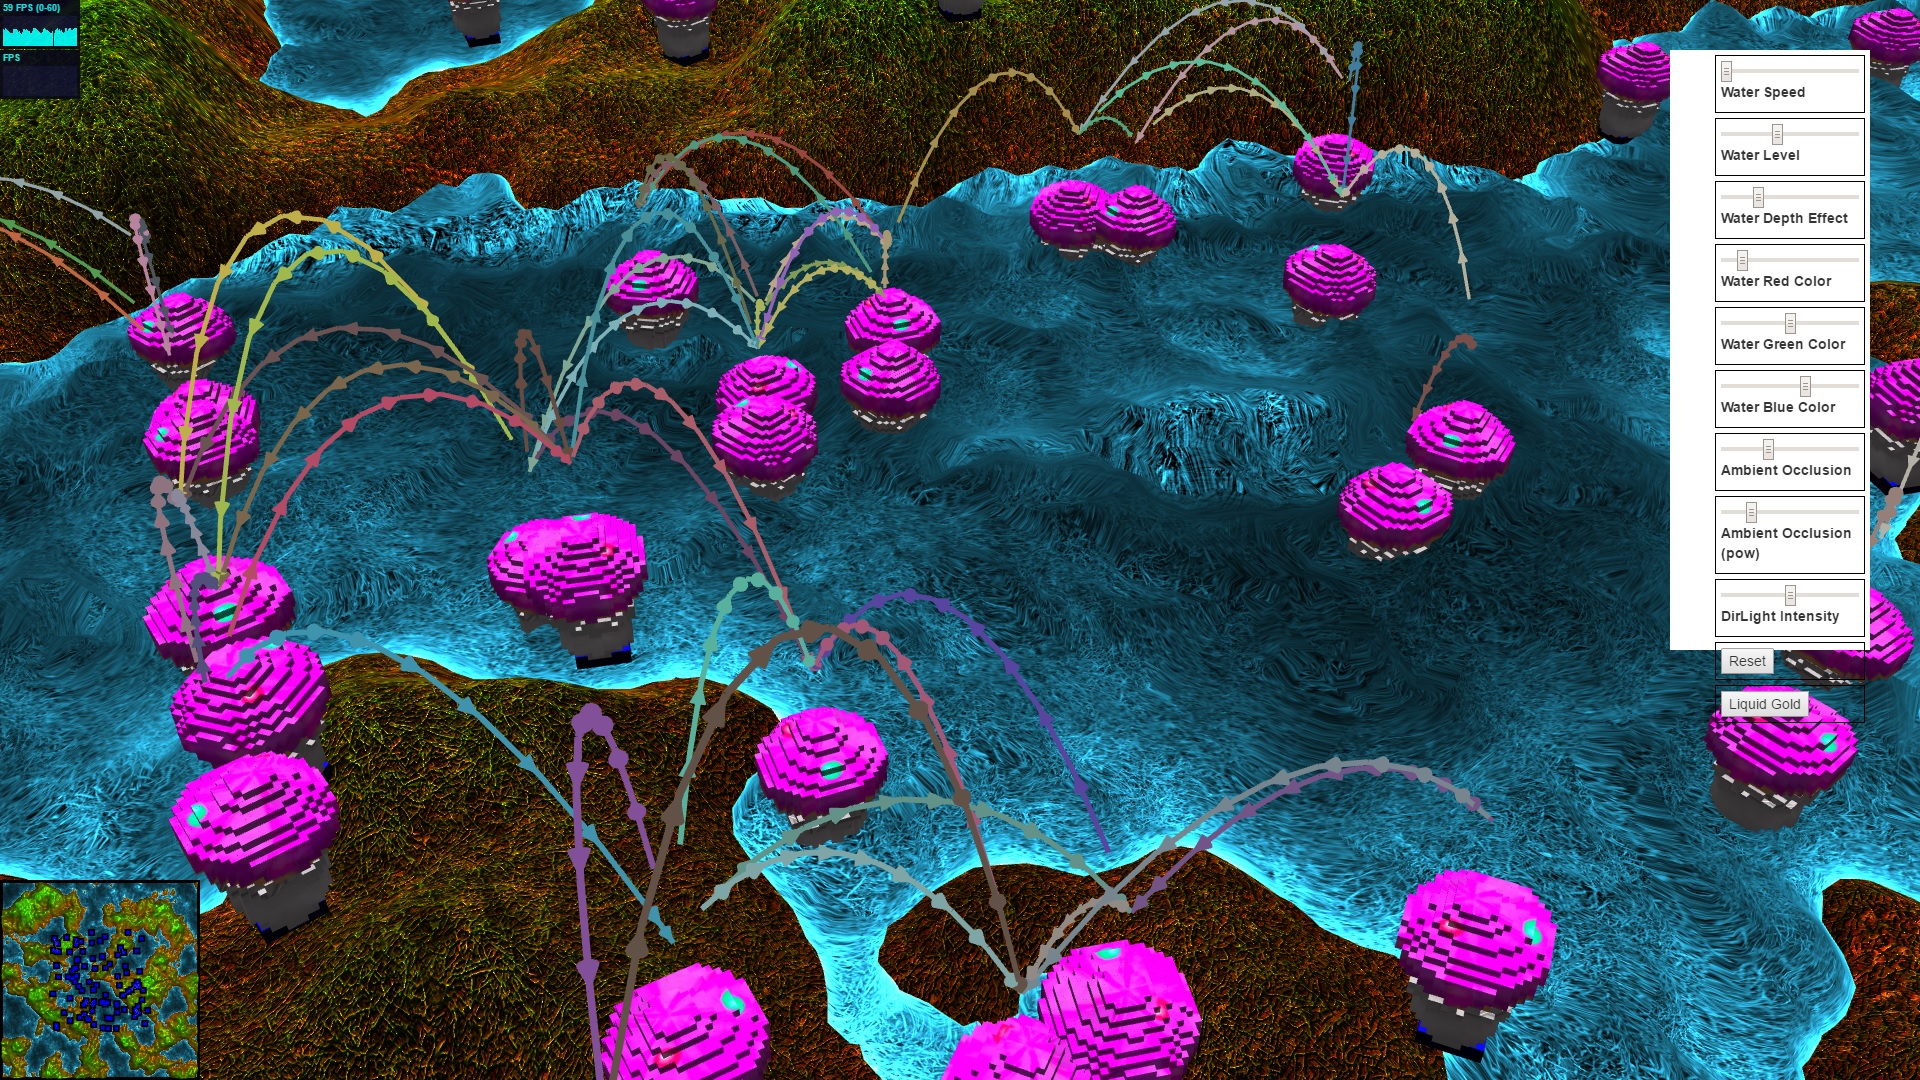
Magic stars
I thought it would look nice to have magic stars raining down on buildings to indicate they are under construction or some other property, perhaps being under a spell. The GLSL just renders quads facing the camera, billboards as they are called and moves them from a source according to a formula to the location of the voxelized boxes of the unit geometry.
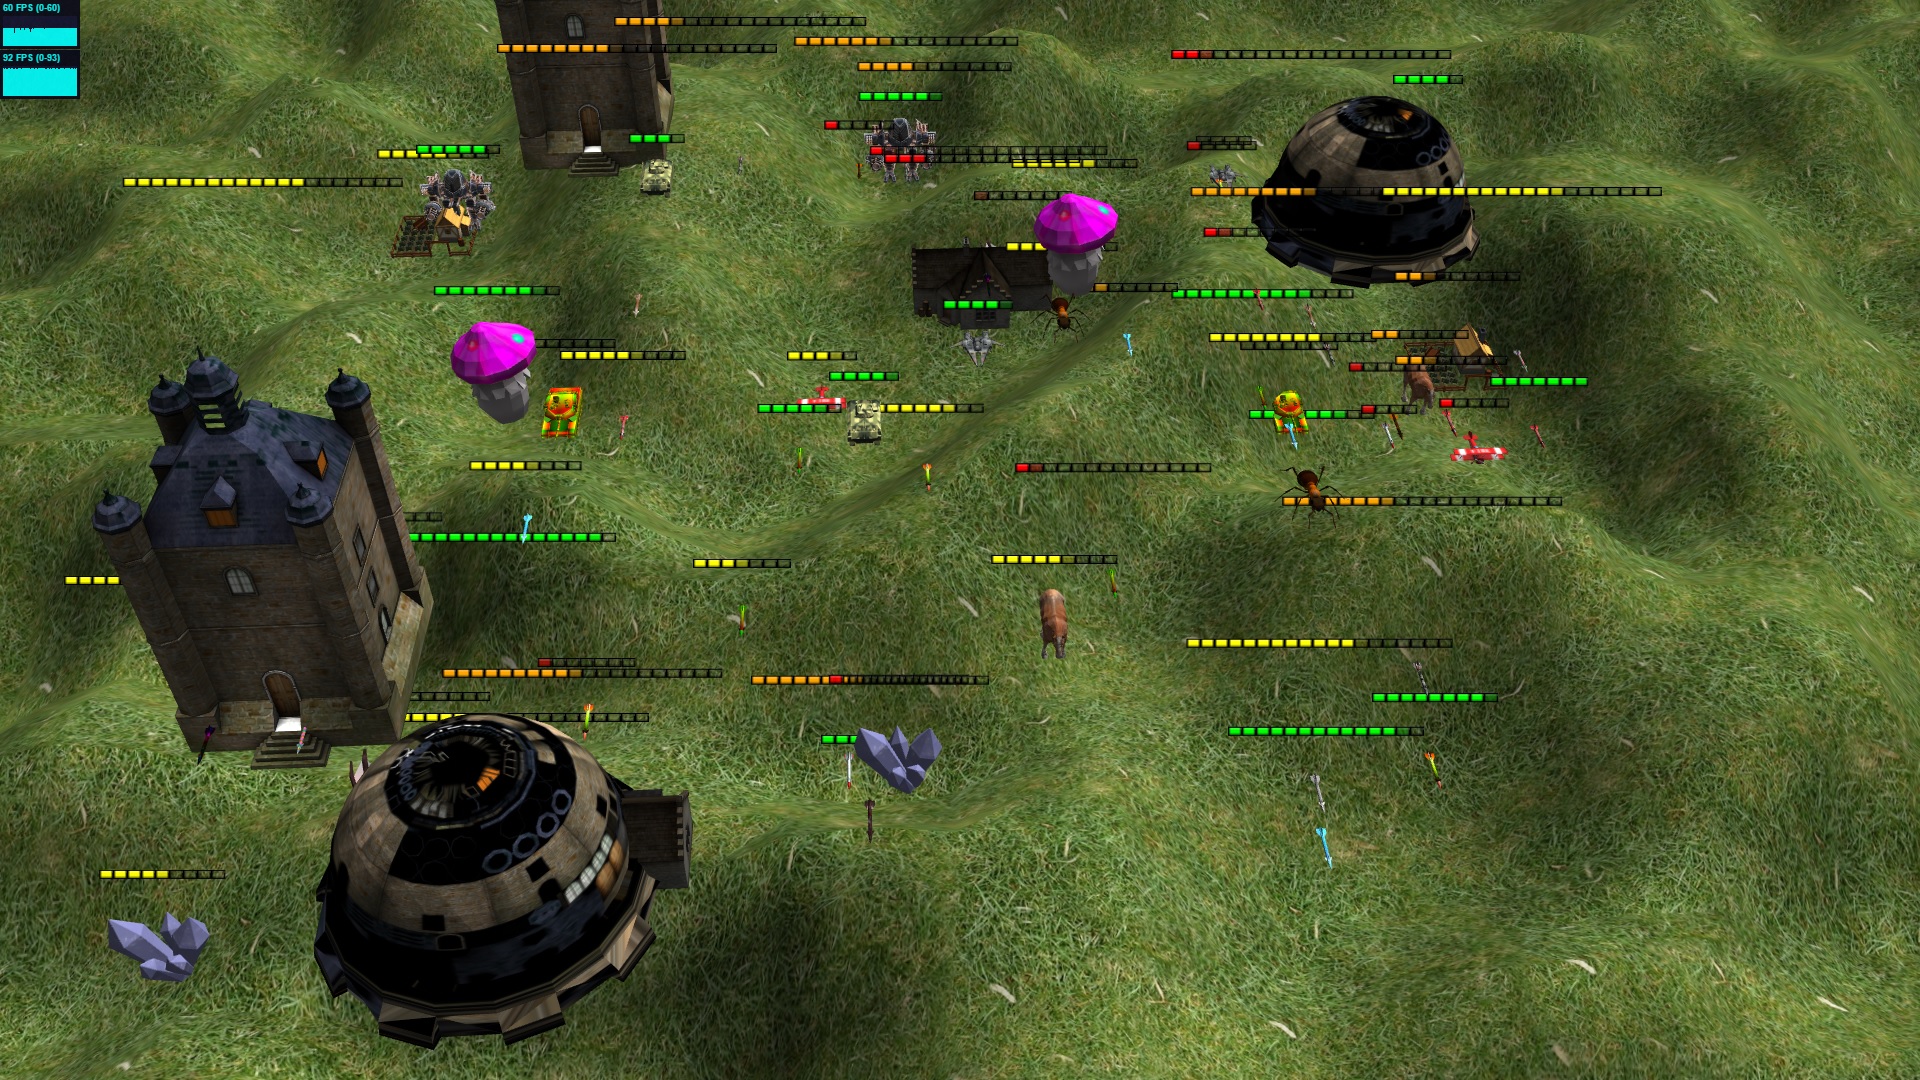
Health bars
PS: There is a bug in this screenshot, where some health bars are hidden by unit geometry. Should be easy to fix by changing the z-order.
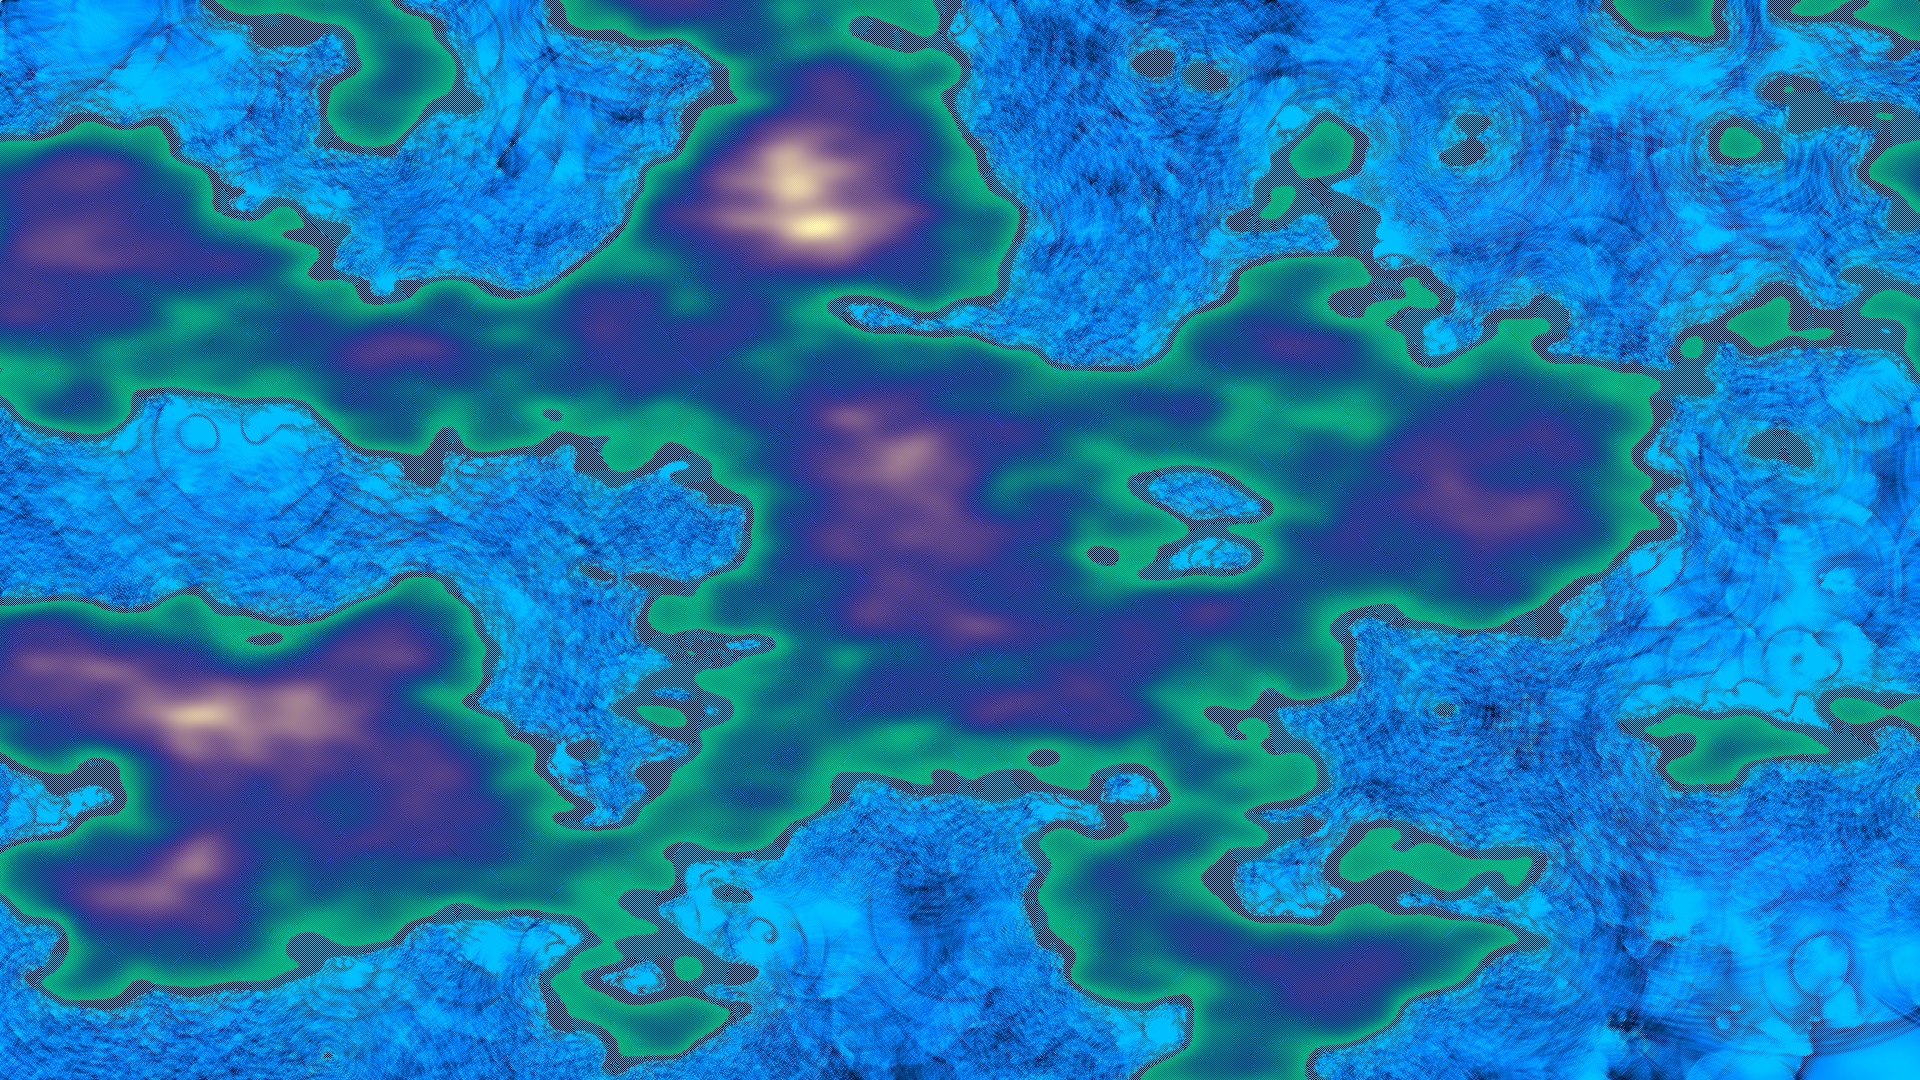
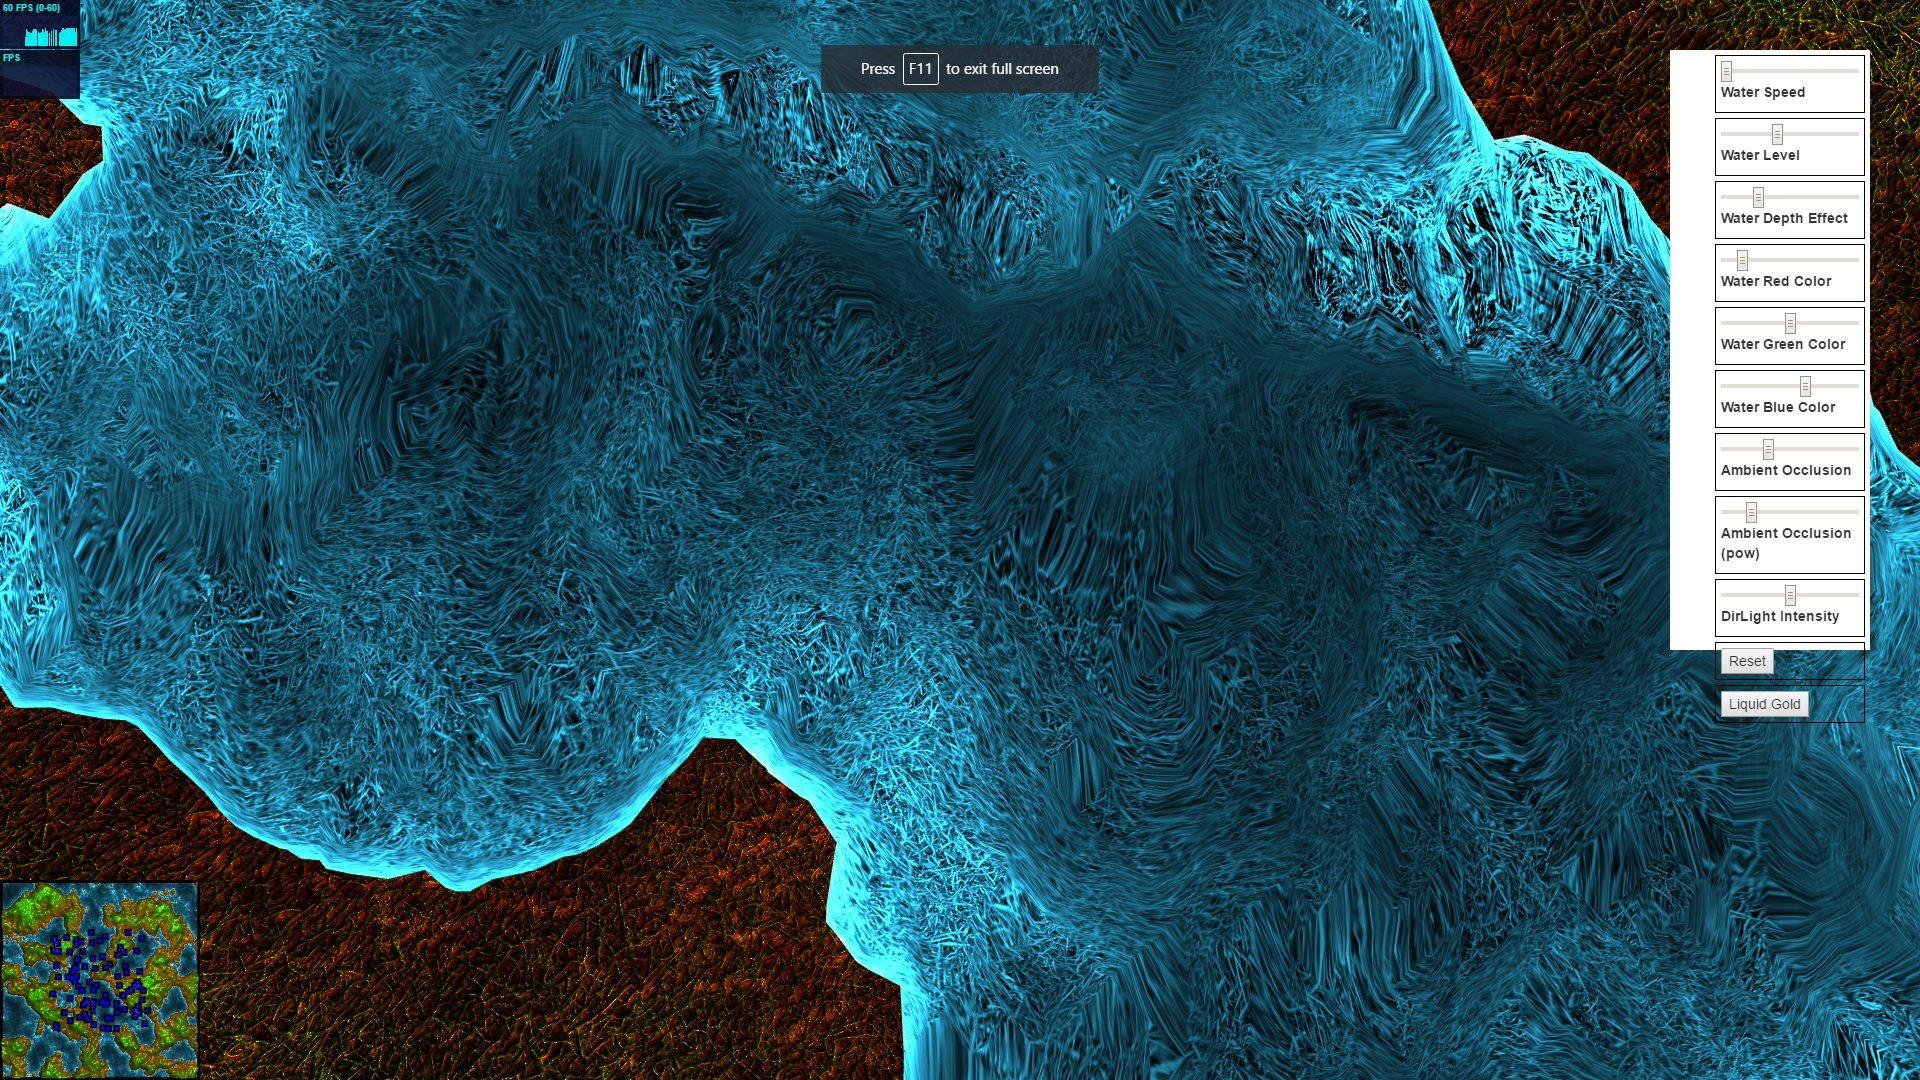
Water
I adapted the WebGL water code from Evan Wallace to work with a terrain, although I was not successful in getting the caustics to render properly. Maybe I will try again later. The way to bounce off terrain was simply to return zero for the neighbouring cell which is terrain when averaging the 4 neighbours of a cell. Easy, right? :) I figured it out after studying the code of this WebGL ripple tank. I experimented with the shader first at ShaderToy but ended up using a different simpler version for the game.
Marquee selection
I tried out 3 different approaches to get this working fast and accurate:
- Subfrustum selection is fast, but inaccurate.
- Projecting unit bounding boxes onto screen is slow.
- Project unit bounding spheres onto screen is fast and accurate.
Check out these links and Stack Overflow questions for more details:

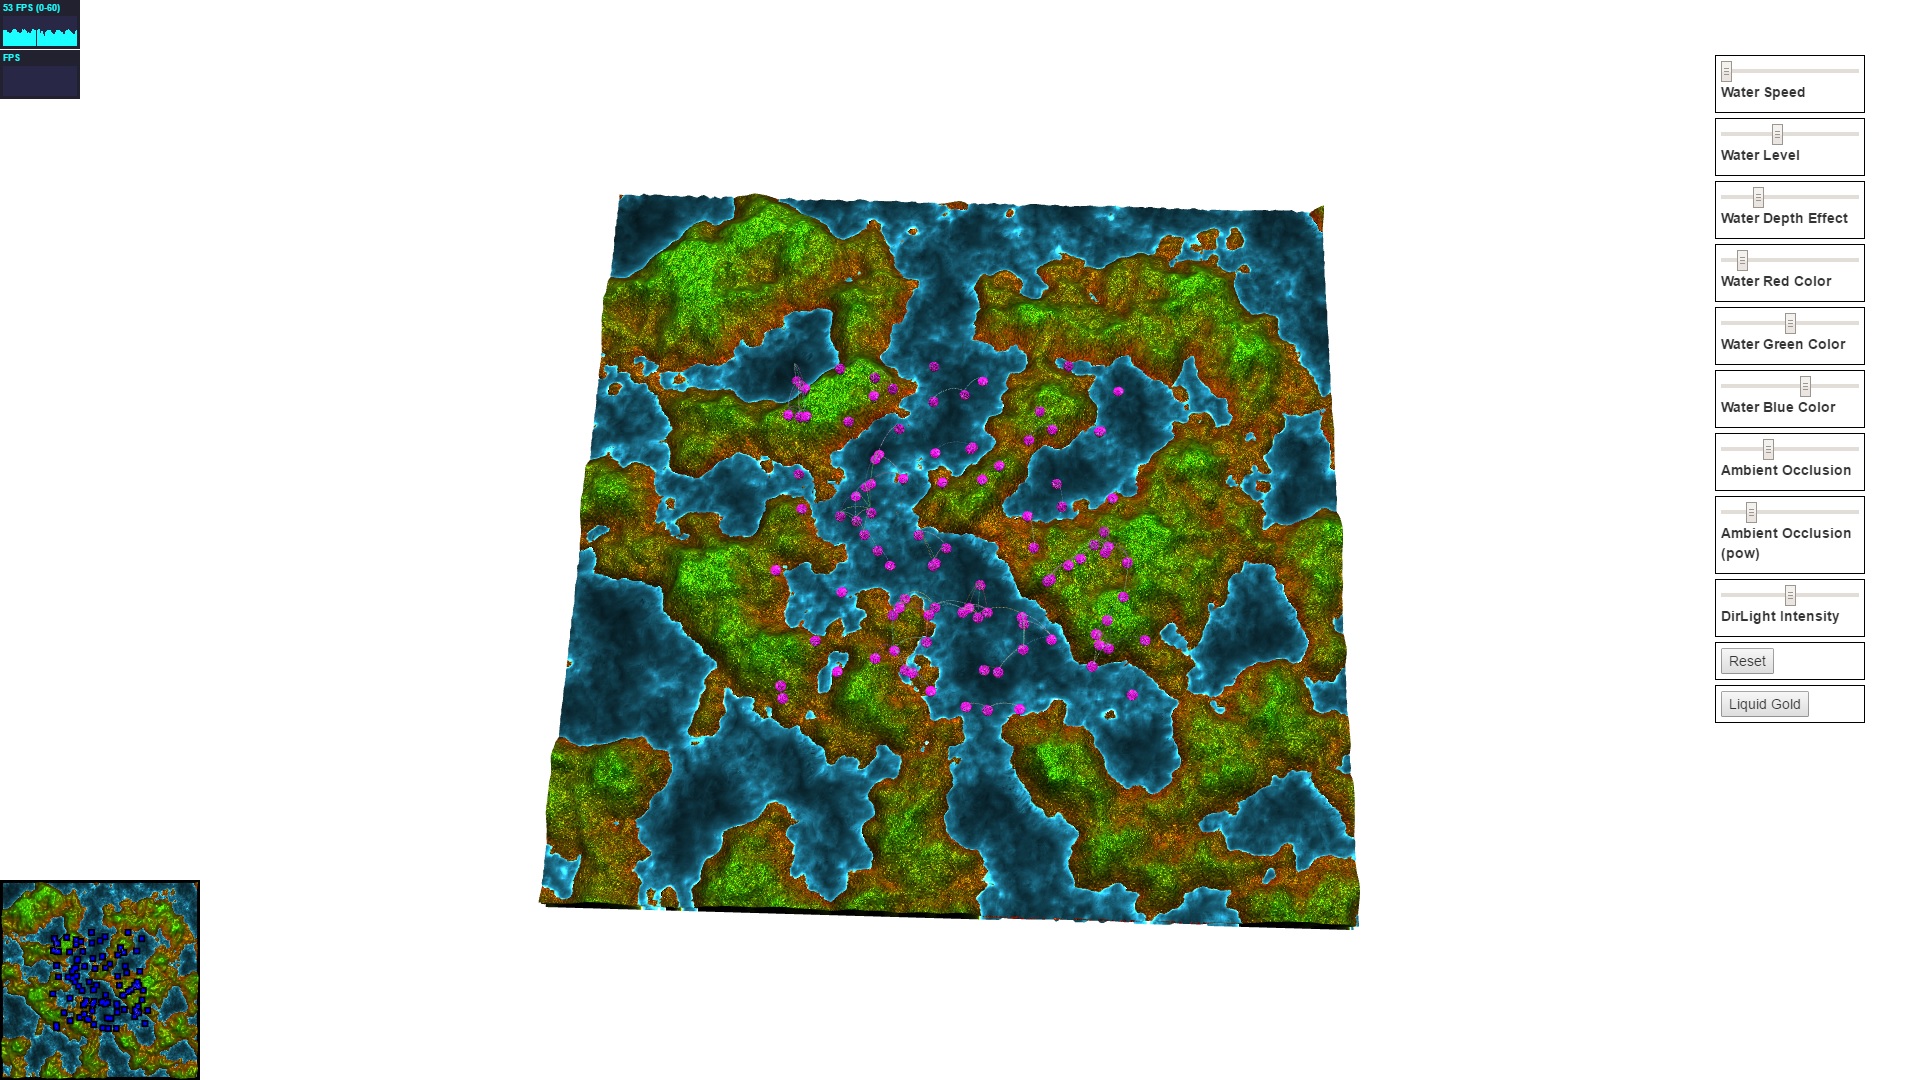
Minimap
The minimap is just the same scene rendered from a fixed top down perspective, except units are toggled invisible and unit box markers are toggled visible and fixed at a certain height above max terrain elevation. The blue square with black border is created using this technique. In the following screenshot I zoomed the camera out so you can see that it’s just mostly the same rendering for minimap. It seems fast enough currently, but it might be worth optimizing by caching the terrain and water rendering for the minimap later. You can’t click the minimap yet, so I have a todo item there.
Attack vectors using MathBox
It might be overkill to include MathBox in an RTS, but line drawing in WebGL is hard and I wanted some vectors to show which unit is attacking which other unit. I used an updated fork of MathBox for three.js r84 that I found a link to on the MathBox Google Group. It was a bit of a hurdle to get the MathBox context, coordinate and scaling system to work well with my existing three.js scene, but once it was working MathBox is really smooth and fun to work with. I used a GLSL shader to resample and animate the vector paths.
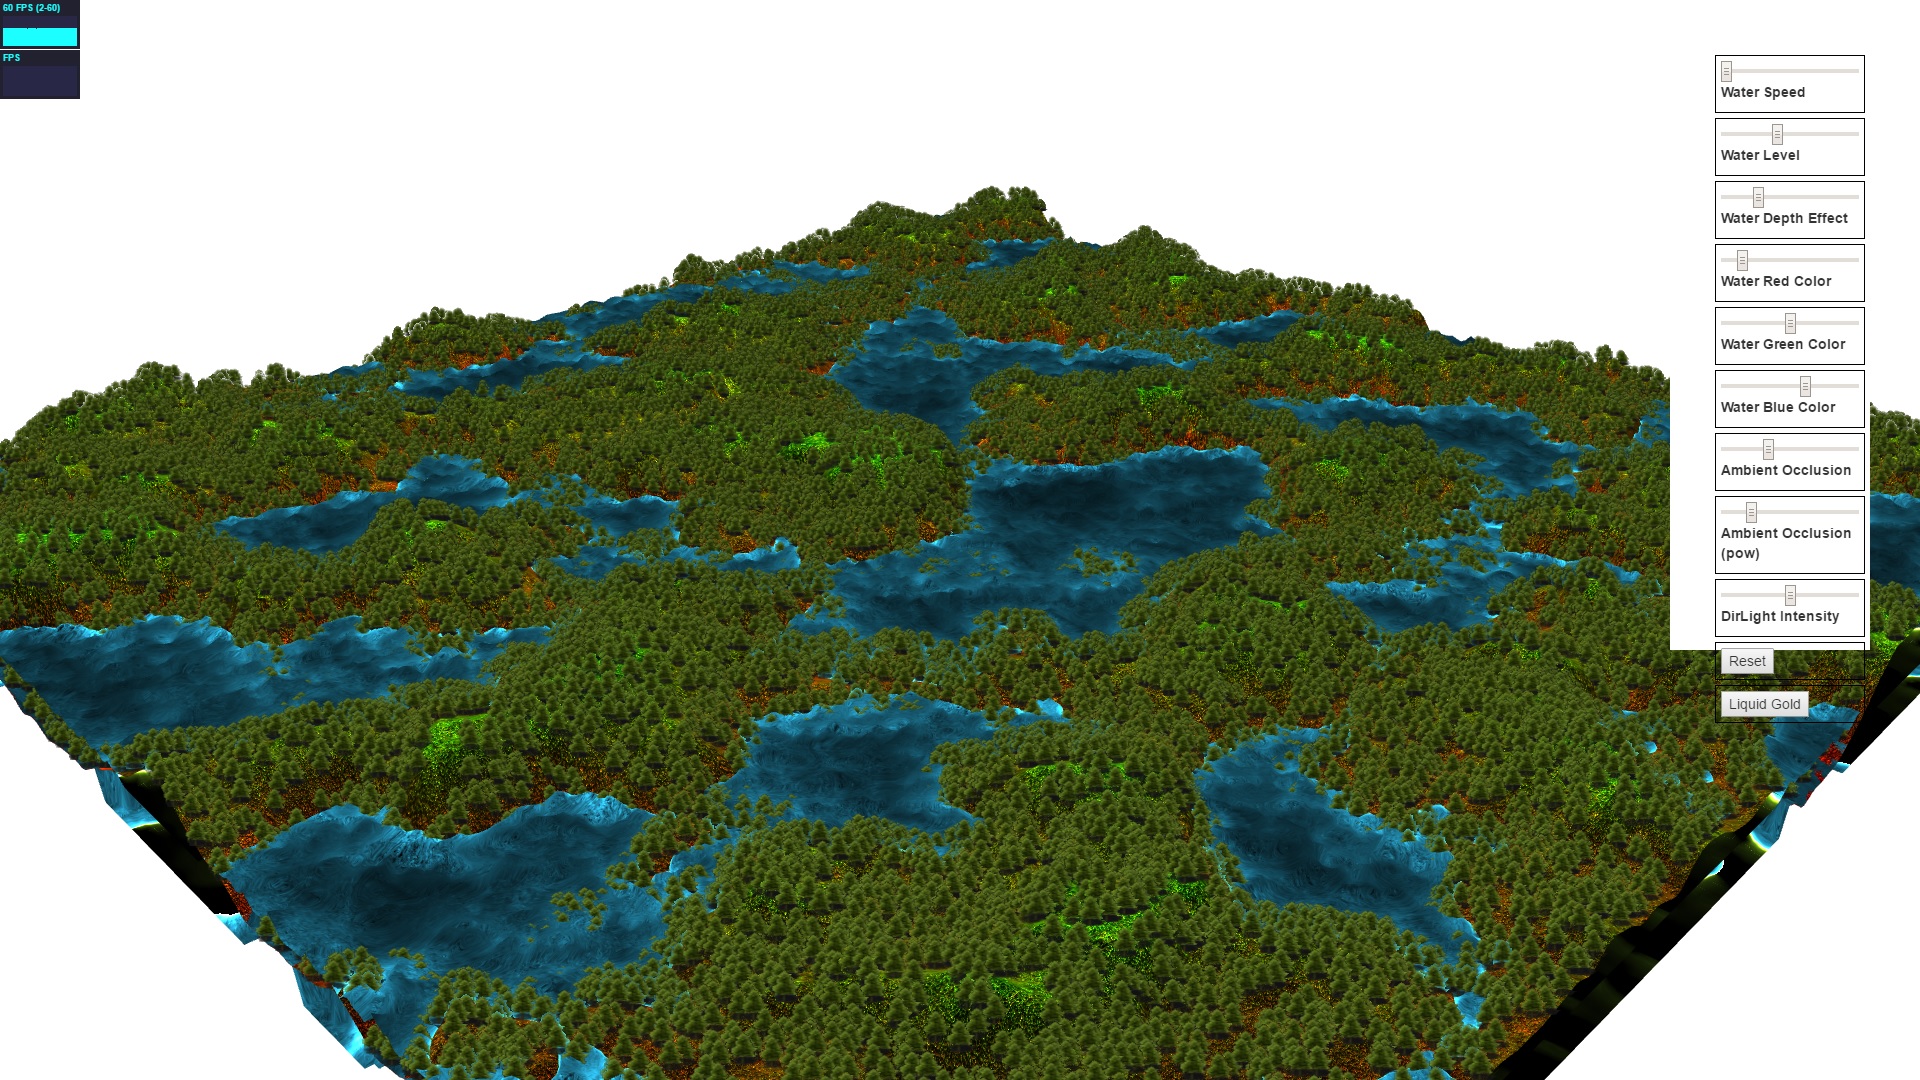
New GPU game engine
This post is about a new GPU game engine, billboards, forest and kovasb/gamma.
I decided to scratch the idea of using a web worker to run the engine. Instead I want to run the engine on the GPU, using WebGL shaders. This allows to scale to a huge number of units (target 64k). But at this scale I can’t render expensive geometries anymore, so I will render billboards. This page explains how to do it. I am using solution #2 from that page. In addition, I need to discard transparent fragments in the fragment shader, as described here. Otherwise transparent fragments write to the depth buffer and block other fragments without setting a color, and that looks very glitchy. I am also using instancing to make it fast. Today I implemented only rendering a 2D sprite on the billboards, but I will switch it up later by rendering one instance of a 3D model to a texture at current camera angle, and then displaying that on all the billboards. I think it will be a decent approximation.
At large scale, multiplayer will also be a lot harder, and would have to be some kind of lock-step or turn based solution, so I think I will drop it, or maybe have 2 modes, swarm mode for single player and few units mode for multiplayer.
Also, a lot of my current work, like explosions, magic stars and attack vectors will need a rethink and reimplementation with the new GPU engine.
Here is a screenshot
of a forest using trees on the new engine unit billboards. It runs 64k trees at
60 FPS.
I decided to start using the ClojureScript library kovasb/gamma for writing GLSL shaders functionally in a ClojureScript DSL rather than directly. Note that hendekagon/gamma on Clojars is a more recent packaging, and provides necessary fixes to for example aget for vector and matrix indexing. Gamma buys me composability. It’s a bit hard to get started, since documentation is not perfect, but you can piece it together from the Wiki, tutorial, the test code, examples and the source code itself. Using imperative hacks like the “discard” statement is hard though, because gamma is purely functional and only supports assignments at the top level. So since I needed “discard” I resorted to putting a “magic” vector vec4(0.0, 1.0, 2.0, 3.0) and doing a string search/replace of that line with discard. I opened an issue for gamma.
Next up is collision detection. At first I was thinking I needed a bounding volume hierarchy, asking a question on StackOverflow, but after asking on the EFNet IRC channel #shader.no I am reconsidering a simpler grid approach. The problem is that WebGL does not have atomic compare-and-exchange, so storing multiple objects per cell, for example in a linked list, is hard. I will write about my workaround if and when I find a solution.